


Rolling a Classic Joint: Step-by-step Guide
But rolling a tight spliff is easier said than done. Anyone can roll a decent blunt, but it takes some practice and experience to get it just right. Here is a quick guide that will teach you the basics of rolling like a pro.
Set up your station
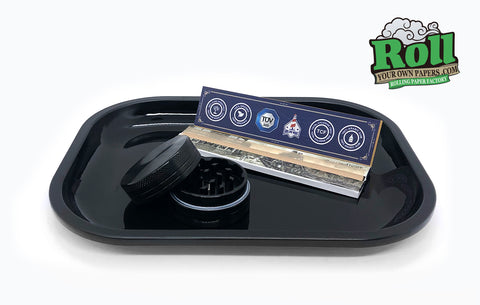 As a newbie to rolling joints, you should consider using a rolling tray to start. It provides a clean and even surface and enough space to catch the precious herb that does not make it into the joint.
Next, you will need a grinder to grind up the bud to the perfect consistency. Be warned, though, not everyone has beginner’s luck, so getting the consistency right might take a couple of attempts. You will know when you get that perfect consistency when the joint is easy to drag and does not clog with resin. Generally, a slightly coarser consistency is what you are looking for.
When starting, you will probably have a couple of flowers to test out. Each strain of herb has its characteristics and you will no doubt find a strain that goes down better than others. It is always a good idea to try and make a couple of each flower and test them out.
Lastly, the paper that you use for your joint is super important. Like the different strains of herb, there are different papers as well, and picking the one that is right for you is a matter of choice.
Once your setup is good and all the ingredients are there, you can start with the first step of building a super joint.
Step 1: Preparing your bud
The first step is probably one of the most important steps to take, seeing that it will determine how well the air flows through your joint. Grinding the bud down to a medium coarseness is the consistency that you are looking for. To put it into perspective, you are looking for a consistency that resembles the size of rice grains.
Not everyone has a grinder, so there are a couple of alternatives. Either grab a pair of scissors from the kitchen or use a sharp knife. You can finally have a use for that ornamental mortar and pestle that is gathering dust on the window and if all else fails, use your fingers. They might get sticky from the residue, so rinsing those digits now and then will make the process much easier.
Step 2: Fixing a crutch
Using a crutch is entirely optional, but it is recommended for newbies. Your creations will look like pre rolled cones after some practice. Nevertheless, herb smoke can be harsh on the lungs for the uninitiated and cause a person to cough a bit.
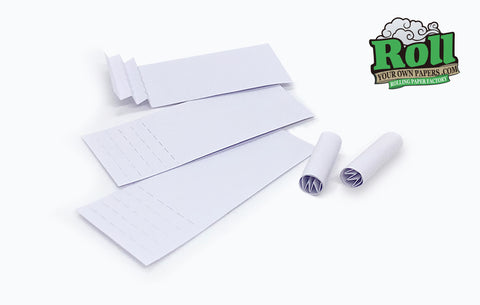
The crutch is the solution to that little problem. A crutch acts like a little filter and keeps the leaves from spilling out the wrong end. To make a crutch, take a ½ to ¾ inch strip of paper and give it a couple of fine accordion folds. Now fold the rest of the strip around the folds so that it forms a tube. The girth of the tube should be roughly the same as a cigarette.
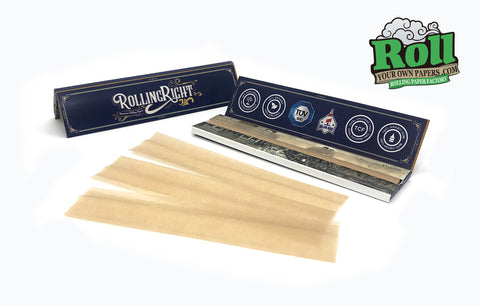
Step 3: Preparing the paper
For folks who do not have very nimble or delicate fingers, preparing the paper can sometimes be a frustrating step. To make sure you never run out, buy your rolling paper wholesale and stock up. Now take one rolling paper and hold it between your middle finger and the thumb of your dominant hand.
With the glue strip facing you, give it a gentle crease down the middle along the length of the paper. This will act as a bed for the herb to rest in. Place the filter or crutch on one side and old it in place with your index finger. Now you are ready to add the good stuff.
Step 4: Packing the product
With a free and steady hand, start pouring the desired amount of herb in the remainder of the crease. Be careful not to press down on the herb as this will cause it to stick and make the joint hard to draw.
Once you are satisfied with the amount of herb, hold the paper on both ends and start rolling it back and forth until the herb forms a natural tube. This step might take a bit of practice as it is a delicate procedure and requires you to acquire a feel for how tight the joint should be.
Step 5: Tuck and roll
Once the shape of the joint is formed, it is time to finish things up. Take the one edge of the paper and fold it over the joint away from you, the sticky strip should still face you. Once the folded edge is tucked into the other side, you can fold the sticky strip towards you.
Gently roll the joint until only the sticky strip is exposed and give it a gentle lick. After the entire strip is moist, gently rub it down onto the rest of the joint to seal it up. All that is left to do is to give the open end of the joint a twist to seal the end and that there is all there is to it.
Alternative rolling techniques
The joint is the absolute classic but when confidence is high, new frontiers await. You could try and build a blunt for those parties where a bigger joint is needed to pass around. For a cleaner smoke with less paper, there is the backward roll.
Essentially, the shape of the joint will be the same, but the amount of excess paper that you burn and inhale is much less. Whichever method you choose, the great thing about rolling your joints is that practicing to roll is half the fun.


Leave a comment