




🌿 How to Clean a Herb Grinder: The Ultimate Guide (That Actually Works) ✨

Look, I get it. Your grinder's been your trusty sidekick for months (maybe years?), and now it's stickier than a movie theater floor. The lid barely twists, there's mystery gunk in every crevice, and you're pretty sure something's growing in there that wasn't part of the original design. Don't worry—you're definitely not alone, and I'm about to show you exactly how to bring that bad boy back to life.
Whether you've got a sleek metal four-piece, a budget-friendly plastic number, or even one of those fancy wooden grinders your friend swears by, I've got you covered with cleaning methods that actually work. No fluff, no corporate jargon—just real talk about getting your grinder squeaky clean while saving every precious crystal along the way.
📋 Table of Contents
- Why You Actually Need to Clean Your Grinder
- When Should You Clean It?
- What You'll Need (Probably Already Have It)
- Method 1: The Freezer Method (Save Your Kief!) ❄️
- Method 2: Isopropyl Alcohol Deep Clean 🧪
- Method 3: Boiling Water Refresh 💧
- Method 4: The Milk Trick (Yes, Really!) 🥛
- Method 5: Gentle Soap & Water Wash 🧼
- Method 6: Ultrasonic Cleaner (Next Level) 🔊
- Method 7: Quick 5-Minute Maintenance 🕐
- Cleaning Different Grinder Types
- Common Mistakes to Avoid
- Preventive Maintenance Tips
- FAQ
Why You Actually Need to Clean Your Grinder (No Judgment) 🤔
Alright, let's talk about why that sticky situation is actually a bigger deal than you might think. I used to be the person who'd let my grinder go for months without cleaning—until I learned what was really happening inside.
Your Grinder is Basically a Bacteria Hotel Right Now 🦠
Here's the uncomfortable truth: all those plant particles trapped in your grinder? They're creating a cozy environment for bacteria and mold to throw a party. Every time you use it, you're potentially introducing those unwanted guests to your fresh herbs. Not exactly the experience you were going for, right?
You're Wasting Good Stuff (And Money!) 💸
When your grinder's teeth are coated in residue, they can't do their job properly. You end up with an uneven grind, which means uneven burning. Plus, all those crystals stuck to the walls? That's potency you paid for that's just sitting there going to waste. A clean grinder means you're actually getting what you paid for.
It's Making Your Life Harder Than It Needs to Be 😤
Ever had to use both hands and all your strength just to twist open your grinder? That's not normal—that's just buildup making you work way harder than you should. A clean grinder should twist smoothly with one hand, making your prep work quick and effortless.
Your Herbs Deserve Better Treatment ✨
When you're grinding fresh material with old residue still in there, you're mixing flavors and aromas in ways that definitely weren't intended. It's like making a fresh cup of coffee in a dirty pot—sure, it'll work, but it won't taste nearly as good as it should.
When Should You Clean Your Grinder? (The Honest Answer) ⏰
The frequency really depends on how you use your grinder. Here's my rule of thumb based on actual usage patterns:
Daily Users: Every 2-3 Weeks 📅
If you're reaching for your grinder daily, you'll want to give it a proper deep clean every couple of weeks. I know that sounds like a lot, but trust me—your grinder (and your herbs) will thank you. In between deep cleans, do a quick brush-out every few days.
Weekend Warriors: Monthly Maintenance 🗓️
Using your grinder a few times a week? A monthly deep clean should keep things running smooth. You'll probably notice it starting to get sticky around week three, which is your cue that cleaning day is approaching.
Occasional Users: Every 2-3 Months 📆
If you're only breaking out the grinder once or twice a month, you can stretch your cleaning schedule to every couple of months. Just make sure to check for any moisture or unusual smells between uses.
Warning Signs You Can't Ignore 🚨
- The Twist Test: If you need two hands to open your grinder, it's overdue for cleaning
- The Squeak: Hearing little squeaking noises when you grind? That's friction from buildup
- The Stuck Stuff: When you see hard, crusty bits stuck to the teeth or walls
- The Dark Corners: Any visible dark or discolored spots inside your grinder
- The Kief Drought: Not collecting as much kief as usual? Buildup is blocking your screen
What You'll Need (Probably Already Have It) 🧰
Good news—you don't need any fancy equipment or expensive products. Here's what I keep on hand for grinder cleaning:
The Basics (For Any Method) 📝
- Small brush: An old toothbrush works perfectly (dedicate one just for this!)
- Toothpicks or dental tools: For getting into those tiny grooves
- Paper plate or rolling tray: To catch all that precious kief
- Cotton swabs: For detail work in hard-to-reach spots
- Paper towels: For drying and cleanup
Method-Specific Supplies 🛠️
- Isopropyl alcohol (90%+ preferred): For the deep clean method
- Ziplock bag or glass container: For soaking
- Dish soap: For gentle cleaning of plastic grinders
- Salt (coarse kosher or sea salt): Acts as an abrasive scrubber
- Milk (whole or 2%): If you're brave enough to try the milk method
- Pot for boiling: For water or milk methods
Method 1: The Freezer Method (Save Your Kief!) ❄️
This is hands-down my favorite method when I want to save every single crystal. It's like turning your kief from sticky putty into brittle, easy-to-collect gold dust. Here's exactly how I do it:
Step-by-Step Freezer Cleaning 🥶
Step 1: Empty & Prep (5 minutes)
Start by completely disassembling your grinder. Take out any large plant material you can see and put it aside. Check if your grinder has a removable screen—those need to come out too. Lay everything out on your rolling tray so you can keep track of all the pieces.
Step 2: Into the Freezer (30-60 minutes)
Place each piece in the freezer separately—don't stack them. The cold temperature makes the plant resins brittle and causes them to contract away from the metal. I usually leave mine in for about an hour, but 30 minutes works in a pinch. Pro tip: put them on a plate or tray so they're easy to grab later.
Step 3: The Tap Dance (2 minutes) 🎵
Once frozen, work quickly before things warm up. Hold each piece over your rolling tray and give it a firm tap. You can tap the pieces together or use a butter knife—you'll be amazed at how much falls out. Those frozen crystals just pop right off!
Step 4: Brush Like You Mean It (10 minutes) 🖌️
Now grab your toothbrush and go to town. Brush every tooth, every groove, every thread. The kief should come off easily now. Use your toothpicks to gently scrape between teeth and along the edges. All of this precious material goes straight onto your tray.
Step 5: Detail Work (5 minutes) 🔍
Use cotton swabs for the really tight spots. If you have a multi-chamber herb grinder, pay special attention to the threads and the area around the screen. These spots love to trap kief.
Step 6: Collect Your Treasure 💎
Carefully funnel all that kief into a small container. What you just collected is super potent—it's been concentrated over time. This stuff is gold for topping off your next session or saving for a rainy day.
Why This Method Rocks ⭐
- Preserves 100% of your kief for future use
- No harsh chemicals touching your grinder
- Works on virtually any grinder type (with one exception—see the warning below)
- Relatively quick and super effective
- You end up with bonus material, not just a clean grinder
Freezer Method Warning ⚠️
Plastic and acrylic grinders can become brittle and crack in extreme cold. If you have a plastic grinder, either skip this method or be extremely gentle when handling frozen pieces. I learned this the hard way when my first acrylic grinder literally cracked in half!
Method 2: Isopropyl Alcohol Deep Clean 🧪
When your grinder is seriously nasty and you don't care about saving the kief, this is the nuclear option. It's incredibly effective but also incredibly thorough—nothing survives this treatment.
The Alcohol Soak Process 🫙
Step 1: Disassemble Everything
Take your grinder completely apart. Remove screens, separate all chambers, and lay everything out. Give each piece a quick inspection so you know what you're dealing with.
Step 2: Into the Alcohol Bath
Place all your metal herb grinder pieces in a ziplock bag or glass container. Pour in enough isopropyl alcohol (90% or higher works best) to completely cover everything. If you want extra cleaning power, add a tablespoon of coarse salt—it acts like a gentle scrubber.
Step 3: The Shake & Soak
Seal your bag and give it a good shake for about 30 seconds. The alcohol immediately starts dissolving that sticky resin. Now let it soak. For light buildup, 20-30 minutes is fine. For hardcore gunk, let it go for a few hours or even overnight. I've left mine soaking overnight before, and it came out looking factory-fresh.
Step 4: Scrub Time 🧽
Pull out each piece (wear gloves if you're sensitive to alcohol). Use your toothbrush to scrub away any remaining residue. The alcohol will have loosened everything up, so this should be pretty easy. For stubborn spots, use a toothpick or cotton swab.
Step 5: Rinse & Dry Thoroughly 💧
This step is crucial—rinse each piece under hot water to remove all traces of alcohol. Then dry thoroughly with paper towels. Finally, and this is important, let everything air dry for at least 30 minutes before reassembling. You do not want to trap any moisture inside your grinder.
Advanced Alcohol Technique: Kief Hash 🎨
Here's a cool trick the competitors don't mention: you can actually turn that dirty alcohol into hash! Pour your used alcohol into a flat glass or pyrex dish and let it evaporate completely (do this in a well-ventilated area or outside). What's left is a dark, concentrated resin you can scrape up and use. It's not the prettiest stuff, but it's potent!
Who Should Use This Method? 🤷
- Anyone with a metal grinder that's seriously clogged
- When you need a deep, sterile clean
- If you've been sick and want to sanitize your grinder
- When you're not worried about saving kief
Alcohol Method Don'ts 🚫
Never use this on plastic or acrylic grinders! The alcohol can cause cloudiness, cracking, or even dissolve certain plastics. Also avoid using this on grinders with painted designs or acrylic windows in the lid. Stick to 100% metal grinders only.
Method 3: Boiling Water Refresh 💧
The boiling water method is like giving your grinder a spa day. It's gentle, effective, and works great for custom herb grinders that can't handle alcohol. I use this method when I want something in between the gentleness of soap and the intensity of alcohol.
How to Boil Your Grinder Safely 🔥
Step 1: Prep Your Pot
Fill a pot with enough water to completely submerge your grinder pieces. Bring it to a rolling boil. Make sure you use a pot you don't mind dedicating to cleaning purposes—you probably don't want to cook pasta in this later!
Step 2: Carefully Submerge
Using tongs (seriously, don't use your hands!), carefully lower each grinder piece into the boiling water. The heat starts breaking down those sticky resins immediately. You'll probably see the water start turning a brownish-green color—that's all the gunk coming off.
Step 3: Boil & Stir (10-15 minutes)
Let everything boil for about 10-15 minutes. Occasionally use your tongs to move the pieces around and flip them. This ensures every surface gets the hot water treatment. Keep an eye on the water level and add more if needed.
Step 4: Remove & Scrub
Use tongs to remove each piece and place them on a towel. Let them cool for a minute (they'll be HOT!), then scrub with your toothbrush under hot tap water. Most of the residue should come off super easily now.
Step 5: Final Rinse & Dry
Give everything a final rinse under hot water, then thoroughly dry with paper towels. Let them air dry for at least 30 minutes before putting your grinder back together.
Best For: 🎯
- Plastic or acrylic grinders that can't handle alcohol
- When you want a thorough clean but don't have isopropyl on hand
- Grinders with painted or coated finishes
- Getting rid of stuck-on material without chemicals
Important Safety Note ⚠️
Make sure your grinder is completely metal or heat-safe plastic before boiling. Some cheaper plastics can warp, melt, or release toxins when heated. When in doubt, test with just hot (not boiling) water first.
Method 4: The Milk Trick (Yes, Really!) 🥛
Okay, this is where things get interesting. The first time someone told me about this method, I thought they were messing with me. But it actually works, and there's real science behind it. Plus, you get a bonus beverage at the end—though whether that's a pro or con depends on your perspective!
Why Milk? The Science Part 🧬
The fat in milk acts as a solvent for the plant resins stuck to your grinder. It's essentially the same principle as making infused butter or oil, just on a smaller scale. The heat activates everything, the fat absorbs it, and boom—clean grinder plus infused milk.
The Milk Method Process 🍶
Step 1: Choose Your Milk Wisely
Use whole milk or at least 2% milk—you need that fat content. Skim milk won't work nearly as well. You can also use alternatives like coconut milk or oat milk, as long as they have a decent fat content. I've tried almond milk and it was pretty underwhelming.
Step 2: Prepare the Bath
Pour enough milk into a pot to cover your disassembled grinder pieces. You want the milk to be simmering, not boiling—too hot and the milk will scorch and smell terrible. Aim for a gentle bubble around 180-190°F if you have a thermometer.
Step 3: Simmer Time (15-20 minutes) ⏲️
Drop your metal grinder pieces into the simmering milk. Stir occasionally to ensure even contact. You'll see the milk start to turn a funky color—that's normal! Keep the temperature steady and don't let it boil over.
Step 4: Remove & Clean
Use tongs to fish out each piece. They should be noticeably cleaner already. Give them a scrub with your toothbrush under hot water and dish soap to remove any milk residue and remaining particles.
Step 5: Strain & Store (Optional)
If you're actually planning to use that milk, strain it through a coffee filter or cheesecloth into a glass container. Store it in the fridge and use within 24 hours. You can add it to coffee, hot chocolate, or chai tea. Start with small amounts to gauge potency!
Milk Method Reality Check ✅
Let's be honest—the milk won't be super potent unless your grinder has a TON of buildup. Think of it more as a mild addition to your beverage than anything intense. The real benefit is getting a clean grinder using a gentle, chemical-free method.
When NOT to Try This 🚫
- With plastic or acrylic grinders (heat damage risk)
- If your grinder has paint or coatings
- When the outside of your grinder is dirty (you'll be drinking that dirt!)
- If you're lactose intolerant and actually plan to drink the milk (obviously)
Method 5: Gentle Soap & Water Wash 🧼
Sometimes you just need a simple, straightforward clean without any fancy techniques. This is my go-to method for quick maintenance cleans or when I'm dealing with delicate materials.
The Simple Soap Approach 🧽
Step 1: Disassemble & Pre-Brush
Take your grinder apart and use a dry brush to remove as much loose material as possible. This makes the actual washing much more effective.
Step 2: Prepare Your Cleaning Solution
Fill a bowl or sink with warm (not hot) water and add a few drops of dish soap. You don't need much—a little goes a long way. Swish it around to create some suds.
Step 3: Soak & Scrub (15-20 minutes)
Place all your grinder pieces in the soapy water and let them soak for 15-20 minutes. This gives the soap time to break down oils and residue. Then, use your toothbrush to scrub each piece thoroughly, paying special attention to teeth, grooves, and threads.
Step 4: Toothpick Detail Work 🪥
While everything's wet and soapy, use a toothpick to get into those tiny spaces between teeth and along edges. The soap helps residue slide out more easily.
Step 5: Thorough Rinse & Complete Dry
Rinse each piece under hot running water until there are absolutely no soap bubbles left. Shake off excess water, dry with paper towels, then let everything air dry completely for at least an hour. Soap residue can make your next session taste weird, so really make sure it's all gone.
Perfect For: ✨
- Plastic, acrylic, or wooden custom herb grinders
- Regular maintenance cleans
- When you prefer avoiding harsh chemicals
- Grinders with special finishes or decorative elements
Method 6: Ultrasonic Cleaner (Next Level) 🔊
If you're someone who owns multiple grinders or just loves gadgets, an ultrasonic cleaner is a game-changer. These devices use high-frequency sound waves to create tiny bubbles that blast away residue. It sounds like sci-fi, but it works incredibly well.
How to Use an Ultrasonic Cleaner 📱
Step 1: Prepare Your Grinder
Disassemble and do a quick dry brush to remove loose material. This helps the ultrasonic cleaner focus on the stuck-on stuff.
Step 2: Set Up the Cleaner
Fill your ultrasonic cleaner with water and a few drops of dish soap or a specialized ultrasonic cleaning solution. Place your grinder pieces in the basket—don't let them touch the bottom or sides of the tank.
Step 3: Run the Cycle (3-5 minutes)
Turn on the ultrasonic cleaner and run it for 3-5 minutes. You'll hear a faint buzzing sound—that's the magic happening. For really dirty grinders, you might want to run a second cycle.
Step 4: Rinse & Inspect
Remove your grinder pieces and rinse under hot water. Check for any remaining residue—the ultrasonic cleaner usually gets everything, but occasionally stubborn spots need a quick brush.
Step 5: Dry Thoroughly
Dry with paper towels and let air dry completely before reassembling.
Why Go Ultrasonic? 🎯
- Incredibly thorough cleaning with minimal effort
- Gets into every microscopic crevice
- No scrubbing required
- Safe for most materials (check your grinder's specifications)
- Can clean multiple grinders at once
- Works great for other accessories too (pipes, tools, etc.)
The Investment Factor 💰
Ultrasonic cleaners range from $30 for basic models to $200+ for professional units. Is it worth it just for cleaning grinders? Probably not. But if you have multiple accessories to clean regularly, it might be worth considering. I use mine for jewelry, glasses, and all my smoking accessories.
Method 7: Quick 5-Minute Maintenance 🕐
Sometimes you don't have time for a deep clean—you just need your grinder functional right now. This quick method won't get it sparkling, but it'll get you through until you can do a proper cleaning.
The Speed Clean 🏃💨
Step 1: Quick Freeze (5 minutes)
Toss your grinder in the freezer for just 5 minutes. Not enough time for a full freeze, but enough to make residue less sticky.
Step 2: Aggressive Tap
Tap each piece firmly over a tray. The brief freeze will have loosened some material.
Step 3: Fast Brush
Give everything a quick brush with your toothbrush. Focus on the teeth and the areas that directly impact grinding.
Step 4: Toothpick the Worst Spots
Use a toothpick to quickly clear out the worst buildup spots—usually between the teeth and around the screen if you have one.
Step 5: Reassemble & Go
Put it back together and you're good to go. It won't be perfect, but it'll work way better than before.
When to Use Quick Maintenance ⚡
- When you're in a hurry but need better functionality
- Between deeper cleans to maintain performance
- When your grinder is only mildly sticky
- As emergency prep before having friends over
Cleaning Different Grinder Types: Material Matters 🔍
Not all grinders are created equal, and the material yours is made from dramatically affects how you should clean it. Here's your complete guide to material-specific care.
Metal Grinders (Aluminum, Stainless Steel, Titanium) 🪙
Best Cleaning Methods:
Metal grinders are the tanks of the grinder world. You can use basically any cleaning method: freezer, alcohol, boiling water, milk, soap, or ultrasonic. They can handle it all. My personal favorite combo is the freezer method followed by an alcohol soak for a deep monthly clean.
Special Considerations:
If you have an anodized aluminum grinder (the colorful ones), be gentle with abrasive scrubbing. The color is a coating that can scratch off. Stainless steel and titanium are pretty much indestructible—scrub away!
Maintenance Tips:
- Wipe down the exterior regularly to prevent finger oil buildup
- Check threads for cross-threading and clean them often
- Metal grinders rarely wear out if maintained properly
- Can be sanitized completely with alcohol
Plastic & Acrylic Grinders 🌈
Approved Cleaning Methods:
Stick with soap and water, gentle warm water soaks, or ultrasonic cleaning. That's it. Seriously, don't try anything else or you'll end up with a cracked, cloudy mess that looks like it went through a dishwasher filled with sand.
What to NEVER Do:
- Don't use isopropyl alcohol—it causes cloudiness and can crack or dissolve plastic
- Don't freeze them—plastic becomes brittle when frozen
- Don't use boiling water—it can warp the shape
- Don't scrub aggressively—plastic scratches easily
The Plastic Reality Check:
Honestly? Plastic grinders are cheap and convenient, but they're not meant to last forever. If yours is super gunked up, sometimes it's more practical to just replace it with a metal one than to struggle with cleaning. A decent metal grinder costs $20-30 and will last years with proper care.
Wooden Grinders 🪵
The Delicate Approach:
Wooden grinders are beautiful but finicky. They're porous, which means they absorb moisture and can harbor bacteria more easily than other materials. Your cleaning options are extremely limited.
Safe Cleaning Method:
- Use only a barely-damp cloth to wipe down surfaces
- Brush gently with a soft brush (like a makeup brush)
- Use toothpicks very carefully to remove buildup from teeth
- Never submerge in water or use any liquid cleaners
- Avoid alcohol entirely—it will dry out and crack the wood
Wood Maintenance:
Periodically treat your wooden grinder with food-grade mineral oil or beeswax. This seals the pores, makes cleaning easier, and prevents the wood from drying out and cracking. Just apply a tiny amount, rub it in, and let it absorb overnight.
Ceramic Grinders 🏺
Cleaning Approach:
Ceramic grinders are somewhat rare but are actually awesome to clean. You can use soap and water, gentle alcohol soaks, or ultrasonic cleaning. The ceramic teeth are super hard and resistant to wear.
Handle With Care:
The main risk with ceramic is dropping it—these grinders can chip or crack if they hit a hard surface. When cleaning, work over a soft surface and dry each piece carefully before setting it down.
Electric Grinders ⚡
The Electronic Complication:
Electric grinders present unique challenges because you can't submerge the motor housing. You need to clean the grinding chamber and blades separately from the electronic components.
Safe Electric Grinder Cleaning:
- Unplug and remove the grinding chamber if possible
- Clean the chamber and blades with alcohol or soap and water
- Wipe the motor housing only with a barely-damp cloth
- Never submerge any part with electronics
- Let everything dry completely before reassembling
- Check the manufacturer's instructions—some have dishwasher-safe parts
Common Mistakes That'll Ruin Your Grinder (Don't Do These!) 🚨
I've made every mistake in the book, so learn from my expensive lessons. Here are the things that will definitely mess up your grinder if you're not careful.
Mistake #1: Not Drying Completely 💧
This is the number one way people accidentally grow mold in their grinders. You need to dry every single piece completely—not just wipe it down, but let it air dry for at least 30 minutes. Water trapped in threads or under screens creates the perfect environment for mold and bacteria.
The Fix: After towel-drying, stand all pieces upright in a well-ventilated area. Don't stack them. Point a fan at them if you're impatient. Only reassemble when everything is bone dry.
Mistake #2: Using the Wrong Cleaner for Your Material 🧴
Using alcohol on plastic, boiling water on cheap acrylic, or freezing a budget plastic grinder—all of these will damage or destroy your grinder. I once ruined a $40 grinder by soaking it in alcohol, not realizing it had an acrylic window. The window turned completely cloudy and cracked.
The Fix: Always identify your grinder's material before choosing a cleaning method. When in doubt, start with the gentlest method (soap and water) and only escalate if needed.
Mistake #3: Aggressive Scrubbing on Soft Materials 🧽
Scrubbing plastic, acrylic, or anodized aluminum too hard creates tiny scratches. These scratches not only look bad but also create new places for residue to stick. Over time, your grinder becomes harder and harder to clean.
The Fix: Use soft brushes and gentle pressure on delicate materials. Let soaking time and cleaning solutions do most of the work rather than relying on elbow grease.
Mistake #4: Reassembling While Still Dirty or Wet 🤦
Putting your grinder back together before it's fully clean and dry just traps problems inside. Moisture gets sealed in, creating mold. Residue gets compressed into threads, making future cleaning harder.
The Fix: Be patient. Do a final inspection of each piece before reassembly. Make sure threads are clean and dry. If you spot any remaining buildup, clean it before continuing.
Mistake #5: Forgetting About the Threads 🔩
The threads where your grinder screws together are residue magnets, but they're easy to forget about during cleaning. Dirty threads make your grinder harder to open and can eventually cause cross-threading damage.
The Fix: Run a toothpick or cotton swab along all threads during every cleaning session. They should be completely clean and smooth.
Mistake #6: Cleaning Too Rarely (Or Too Often!) ⏰
Waiting months between cleanings lets residue harden into cement-like deposits that are exponentially harder to remove. But overcleaning can also cause unnecessary wear, especially on softer materials.
The Fix: Follow the frequency guidelines I mentioned earlier based on your usage. Set a calendar reminder if needed.
Mistake #7: Losing Small Parts 😱
Screens, small spacers, and tiny components have a way of disappearing during cleaning. I've lost count of how many screens I've accidentally thrown away with paper towels or washed down the sink.
The Fix: Clean over a towel or tray, not directly over the sink. Use a bowl to hold small parts. Take a photo of your disassembled grinder as a reference for reassembly.
Mistake #8: Mixing Metals in Ultrasonic Cleaners ⚡
If you're using an ultrasonic cleaner and have grinders made of different metals, don't clean them together. Dissimilar metals can cause galvanic corrosion when in contact in a liquid environment.
The Fix: Clean grinders separately if they're made of different metals, or keep them physically separated in the ultrasonic cleaner basket.
Preventive Maintenance: Keep Your Grinder Cleaner, Longer 🛡️
The best cleaning session is the one you don't have to do because you maintained your grinder properly. Here are my proven strategies for reducing buildup and keeping your custom printed herb grinder in top shape.
Daily/After-Use Habits 📅
The Quick Tap Routine
After each use, give your grinder a few solid taps over your tray before putting it away. This prevents loose material from settling and hardening in the crevices. Takes 5 seconds and makes a huge difference over time.
Empty Everything
Don't leave ground material sitting in your grinder. The moisture in plant material can transfer to the metal, creating stickier residue. Always fully empty your grinding chamber after use.
Wipe Down the Exterior
Hand oils, dust, and pocket lint love to accumulate on your grinder's exterior. A quick wipe with a dry cloth after use keeps it looking nice and prevents outside grime from working its way inside.
Weekly Maintenance (For Heavy Users) 🗓️
The Five-Minute Brush
Once a week, do a quick brush-out of all chambers. You don't need to disassemble everything—just open it up and brush the teeth, walls, and screen. This prevents small buildup from becoming big buildup.
Thread Care
Check your threads weekly and run a dry toothpick through them. Clean threads mean smooth operation and longer grinder life.
Screen Inspection
If you have a four-piece grinder with a kief screen, check it weekly. A clogged screen means you're missing out on kief collection. Gently tap it and brush it from both sides.
Monthly Deep Maintenance 📆
Full Disassembly Inspection
Once a month, take your grinder completely apart and inspect every piece. Look for:
- Worn or bent teeth that might need replacing
- Cracks or damage to any parts
- Stuck residue in unusual spots
- Thread wear or cross-threading
- Screen damage or sagging
Preventive Treatment
For metal grinders, you can apply a tiny amount of food-grade lubricant to the threads after cleaning. Use something like coconut oil or food-grade mineral oil—never use petroleum-based products. This keeps threads smooth and prevents residue from sticking as easily.
Storage Best Practices 🏠
Keep It Dry
Store your grinder in a cool, dry place. Avoid humid environments like bathrooms. Moisture accelerates residue buildup and can cause rust on cheaper metal grinders.
Separate Storage
Don't store your grinder in direct contact with other accessories. This prevents cross-contamination and protects your grinder from scratches.
Upright Position
When possible, store your grinder standing upright rather than lying flat. This prevents any residual oils from pooling in one area.
Material-Specific Maintenance 🔧
For Metal Grinders:
- Check for rust spots if you have lower-quality metal
- Polish occasionally with a soft cloth to maintain shine
- Tighten any loose magnets (some are replaceable)
For Plastic Grinders:
- Avoid leaving in hot cars or direct sunlight—heat causes warping
- Replace when you notice cracking or significant scratching
- Keep away from solvents (even hand sanitizer can damage them)
For Wooden Grinders:
- Oil quarterly with food-grade mineral oil or beeswax
- Never store in high humidity
- Inspect for wood splitting or cracking regularly
The Rotation Strategy 🔄
If you're a heavy user, consider owning two grinders and rotating them. While one is in use, the other can be thoroughly cleaned and dried. This eliminates the "I need to use it right now but it's still drying" problem.
What About Grinder Coatings? 🎨
Some grinders come with non-stick coatings or special finishes. If yours has a coating:
- Use only soft cleaning tools to avoid scratching
- Avoid abrasive cleaners or salt scrubs
- Check manufacturer guidelines—some coatings can't handle certain cleaners
- Replace if the coating starts flaking (you don't want to consume that)
Upgrade Your Grinding Game with Premium Herb Grinders 🎯
Look, I've spent this entire guide talking about cleaning grinders, but can we talk about why you might be cleaning yours so often? If you're battling stubborn buildup constantly, it might be time to upgrade to a quality grinder that's actually designed for easy maintenance.
Not all herb grinders are created equal. Cheap ones use soft metals that wear down quickly, creating rough surfaces where residue loves to stick. The teeth get dull, the threads get gunked up, and you end up cleaning them twice as often just to keep them functional.
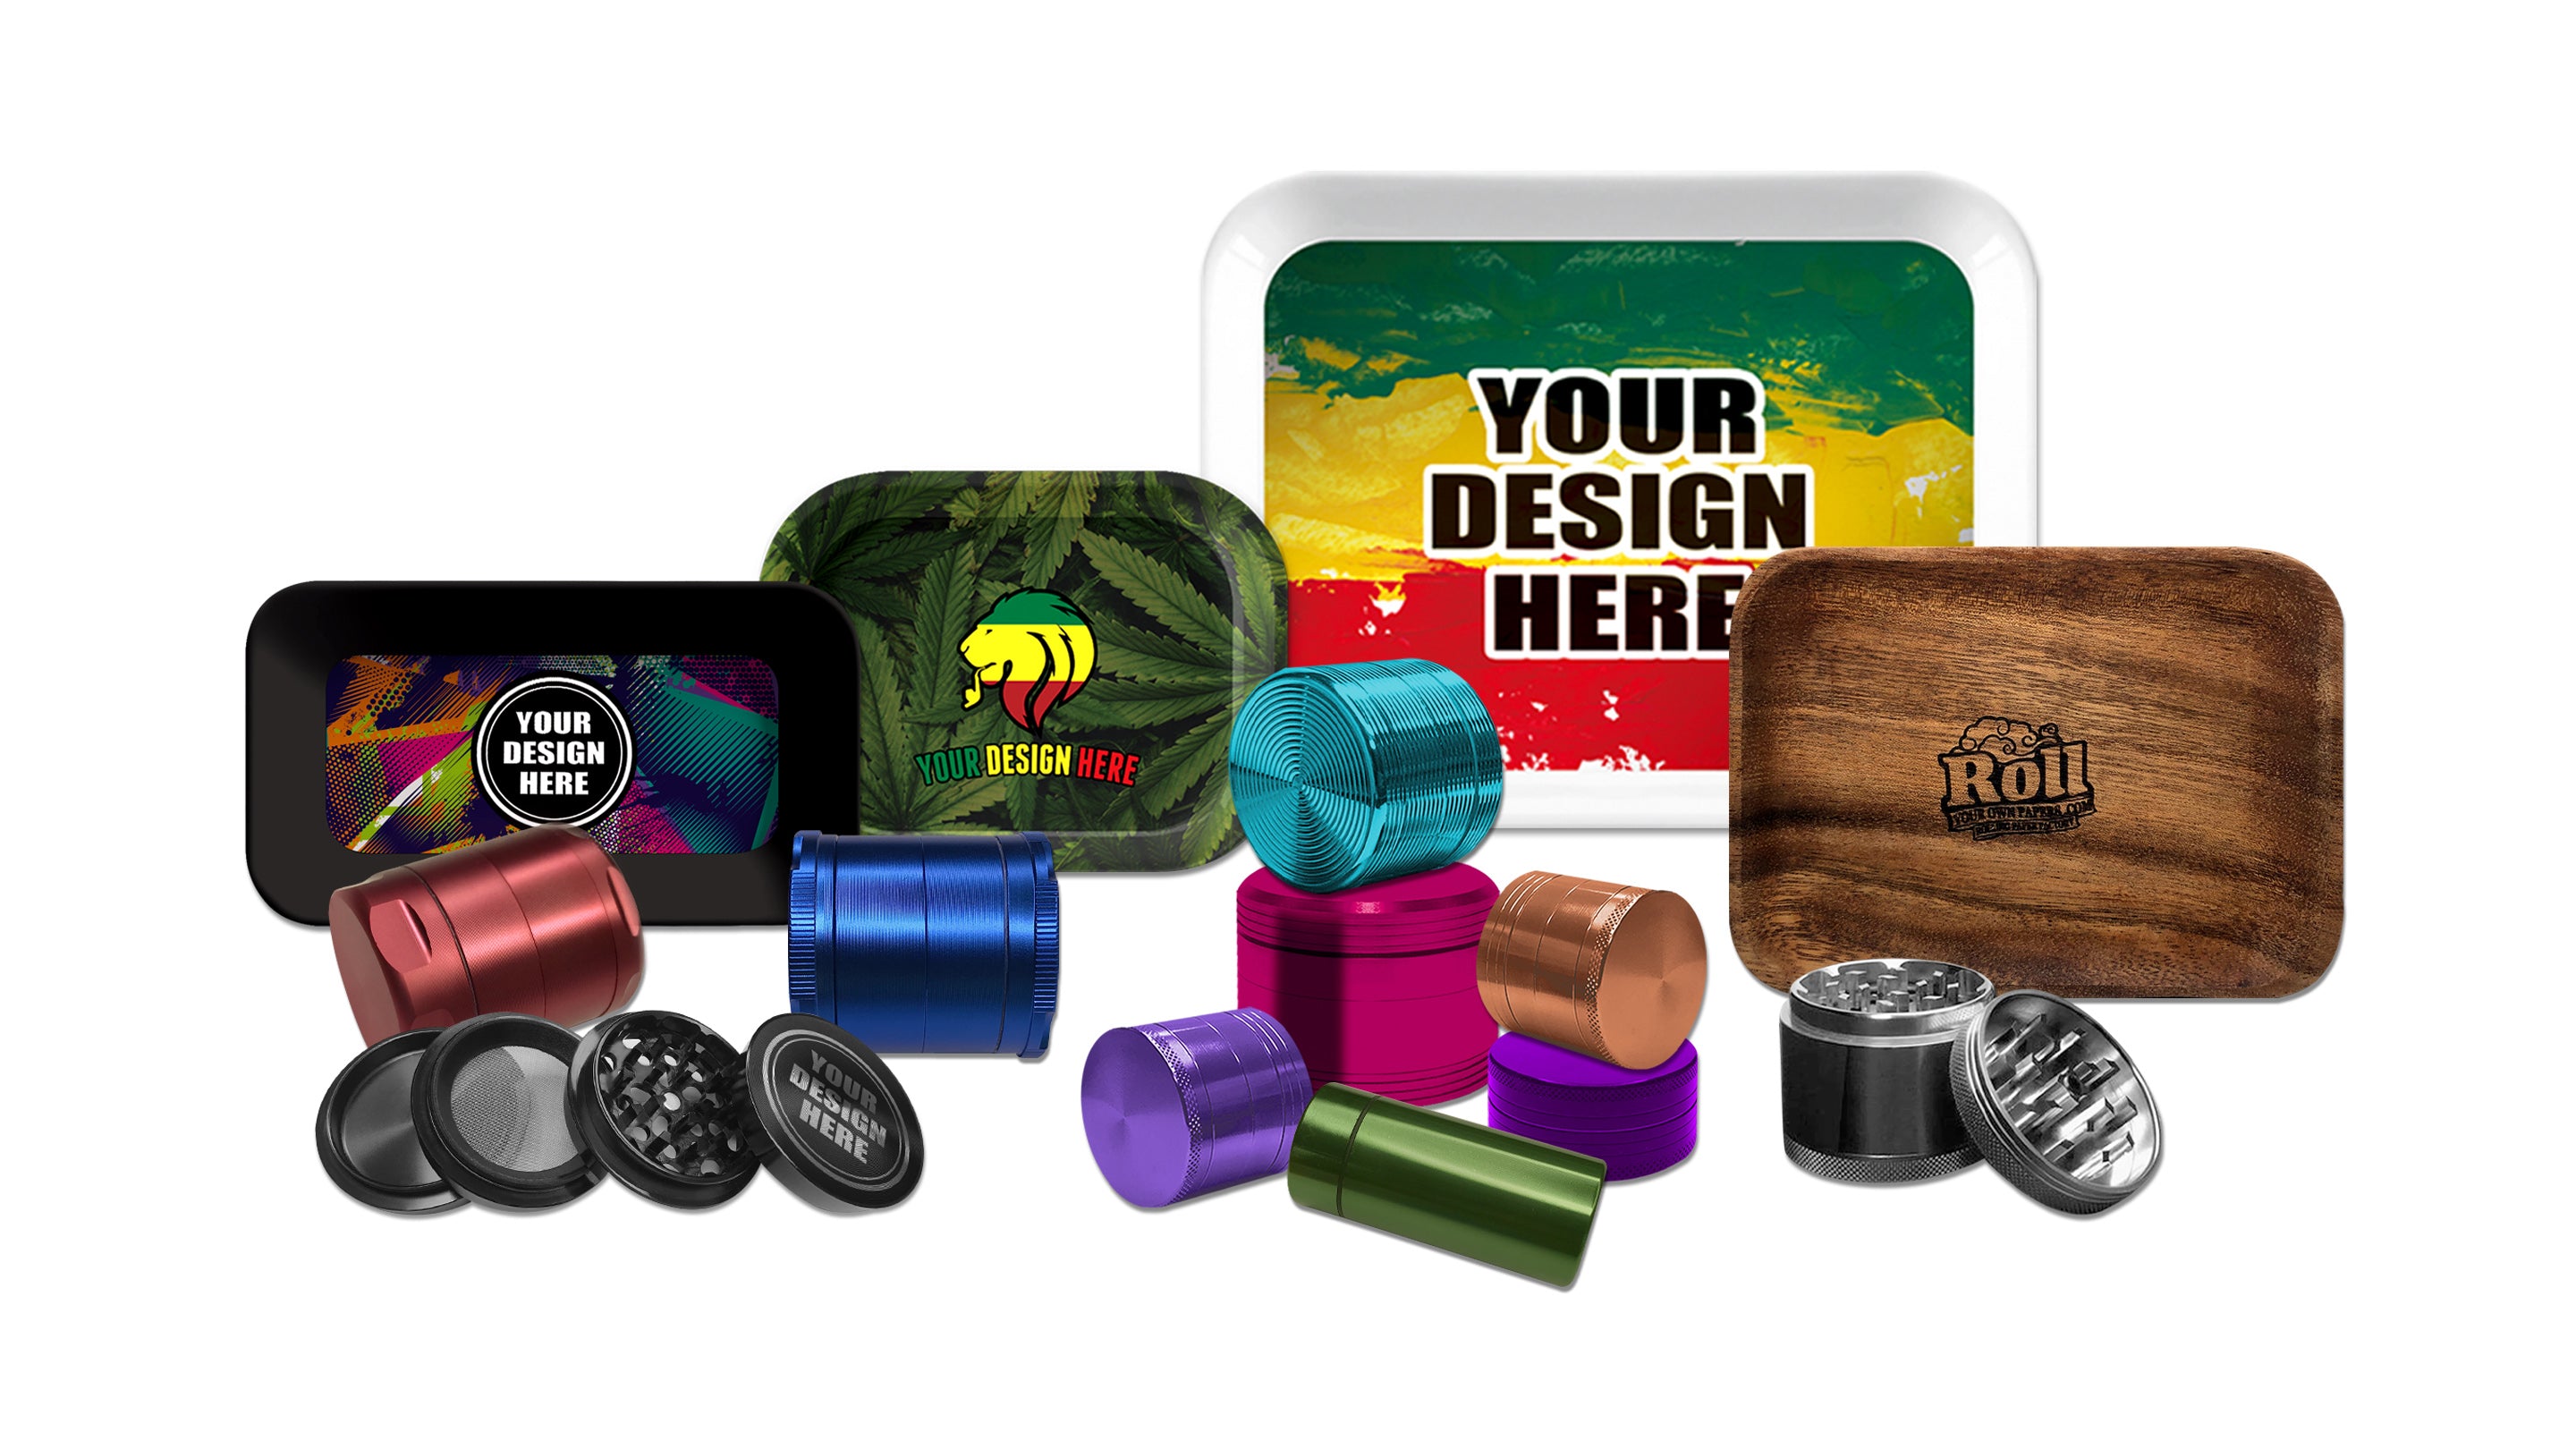
We're talking about precision-machined custom herb grinders with diamond-cut teeth that stay sharp, smooth finishes that resist buildup, and quality materials that'll last for years—not months. Plus, if you want to add some personality, you can get them custom printed with your own designs, logos, or artwork.
Think about it: a quality grinder might cost a bit more upfront, but it'll save you time on cleaning, waste less material, give you a better grind, and last way longer than those cheap ones you've been replacing every few months. Plus, it just feels better to use a solid, well-made tool.
Whether you want a sleek four-piece with a premium kief catcher, a compact two-piece for travel, or a custom printed herb grinder that shows off your style, investing in quality makes every session better—and every cleaning session shorter.
Frequently Asked Questions About Cleaning Herb Grinders 🤔
How often should I clean my herb grinder? ⏰
The cleaning frequency really depends on how much you use your grinder. If you're using it daily, plan on a deep clean every 2-3 weeks with quick maintenance brush-outs every few days. Weekend users can stretch it to monthly cleanings, while occasional users (once or twice a month) can clean every 2-3 months. The real indicator is when your grinder becomes hard to twist, starts making squeaking noises, or you notice visible buildup on the teeth and walls. Don't wait until it's completely stuck—that makes cleaning way harder!
Can I clean my grinder in the dishwasher? 🍽️
Nope, definitely not recommended! While your grinder might technically survive a dishwasher cycle, there are several problems with this approach. First, dishwasher detergent is incredibly hard to rinse completely out of all the small crevices in your grinder, and you'll taste it later. Second, the high heat and harsh detergents can damage finishes, fade colors, and even warp some materials. Third, the powerful water jets can cause parts to bang around and get damaged or lost. Finally, you're introducing your grinder residue to your dish-cleaning system, which is just kinda gross. Stick with hand cleaning—it's faster anyway and gives you a chance to inspect for wear or damage.
Is it safe to use hydrogen peroxide to clean my grinder? 🧪
While hydrogen peroxide isn't immediately dangerous to your grinder, it's not the best choice. It's much less effective than isopropyl alcohol at dissolving plant resins, so you'll end up soaking longer with less impressive results. Additionally, hydrogen peroxide can cause discoloration on some metals, especially if left too long. If isopropyl alcohol isn't available and you have a metal grinder, you can use hydrogen peroxide in a pinch, but expect to do more scrubbing. For plastic or acrylic grinders, stick with soap and water—hydrogen peroxide can cause cloudiness just like alcohol. The bottom line: save the hydrogen peroxide for your first-aid kit and use proper cleaning methods for your grinder.
What should I do with the kief I collect while cleaning? 💎
That kief you're collecting during cleaning is like finding money in an old jacket—it's already yours, but it feels like a bonus! The kief from cleaning is super concentrated because it's been building up over time. Store it in a small, airtight container in a cool, dark place. You can sprinkle it on top of your next bowl for an extra kick, roll it into your next session, or even save up enough to press into hash. Some people freeze their collected kief to preserve freshness if they're saving a lot. Just remember that cleaning kief might be a bit darker and more compressed than freshly collected kief, but it's still potent. If you used the freezer cleaning method, your kief will be cleaner and lighter in color. If you scraped it out without freezing first, it might be darker but still totally usable.
Can I clean a plastic grinder with rubbing alcohol? 🚫
Absolutely not—this is one of the fastest ways to ruin a plastic or acrylic grinder! Isopropyl alcohol is a solvent that can cause plastic materials to become cloudy, brittle, cracked, or even partially dissolved depending on the plastic type. Even if it seems fine at first, alcohol weakens the plastic structure, and your grinder might crack during normal use later. Instead, use warm (not hot) water with dish soap for plastic and acrylic grinders. Let them soak for 20-30 minutes, then scrub gently with a soft brush. This method is totally effective and won't damage your grinder. If your plastic grinder is really badly gunked up and soap isn't cutting it, it honestly might be time to upgrade to a metal grinder that can handle more aggressive cleaning methods.
How do I clean the screen/mesh in my grinder? 🔍
The screen is often the trickiest part to clean because those tiny holes get clogged easily. Here's my foolproof method: First, tap the screen firmly over your rolling tray to knock out loose kief. Then, use a soft brush (like a clean makeup brush or soft toothbrush) to gently brush both sides of the screen. For stubborn clogs, soak the screen in isopropyl alcohol for 15-20 minutes—the alcohol will dissolve the sticky resin blocking the holes. After soaking, rinse thoroughly under hot water while brushing gently. Hold it up to the light to check if the holes are clear—you should see light through every hole. Some people use compressed air to blast out clogged holes, which works great if you have it. Never scrub too hard or use sharp objects directly on the screen, as this can damage the mesh. If your screen is permanently clogged or damaged, many grinders have replaceable screens that you can order.
Will cleaning my grinder remove the color or finish? 🎨
It depends on your grinder's finish and what cleaning method you use. Anodized aluminum grinders (the colorful ones) have a relatively durable finish that can handle most cleaning methods, but aggressive scrubbing with abrasive materials can gradually wear down the color over time. Painted or coated grinders are more vulnerable—alcohol and harsh scrubbing can definitely remove paint. Here's how to protect your grinder's appearance: Use soft brushes only, avoid abrasive scrubbers or salt scrubs on finished surfaces, limit soaking time in alcohol (20-30 minutes max), and focus on cleaning the interior surfaces where buildup occurs. The exterior rarely needs aggressive cleaning—a gentle wipe-down is usually enough. If you have a premium custom-printed or anodized grinder, the freezer method is your safest bet for deep cleaning since it relies on temperature change rather than chemicals or scrubbing. With proper care, a quality finish should last for years even with regular cleaning.
🔥 Ready to Upgrade Your Grinder Game?
A clean grinder is great, but a premium grinder stays cleaner longer! 🎯 If you're tired of constant scrubbing and dealing with sticky, gunked-up teeth—it's time to level up to a quality herb grinder that's built to last.
- ✔️ Precision-machined diamond-cut teeth that stay sharp
- ✔️ Smooth, resistant finishes that repel buildup
- ✔️ Quality materials that last years, not months
- ✔️ Custom printing available—add your logo or artwork
- ✔️ Easy to clean and maintain for peak performance
📦 Bulk orders available | 🚚 Fast shipping | 🌿 Built to last





Leave a comment