


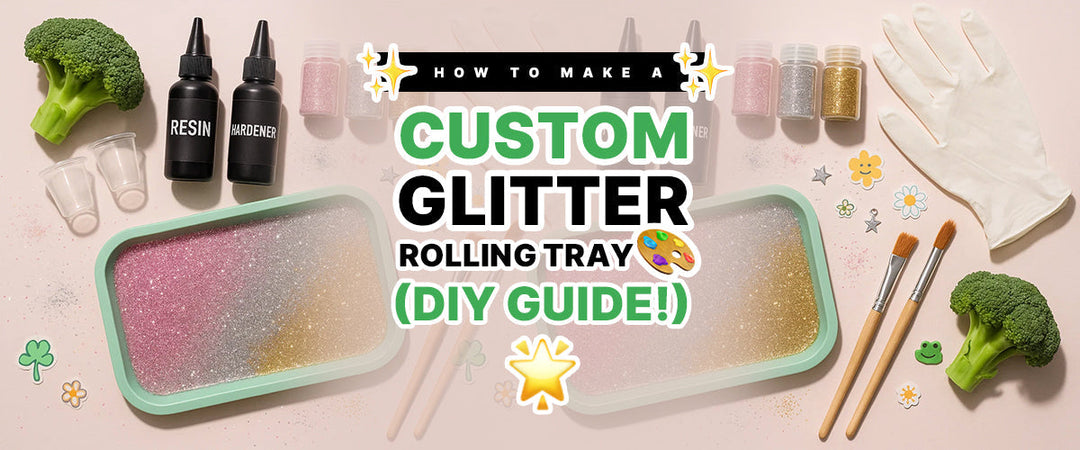
✨ How to Make a Custom Glitter Rolling Tray 🎨 (DIY Guide!) 🌟

Glitter, art, and a super useful tray all in one? Yes please! 🙌 If you've been wanting to jazz up your rolling setup, a custom glitter rolling tray is the ultimate DIY project to add some sparkle and personality. In this guide, we're going to show you exactly how to make a custom glitter rolling tray from scratch, with easy steps and plenty of pro tips along the way.
No need to be a crafting expert—just bring a little creativity and get ready to have fun (and maybe get a bit glittery in the process). We'll cover everything from prepping the tray to working with epoxy resin to sealing in that shine for the long haul. Plus, keep an eye out for handy links to our rolling trays, custom rolling trays, and custom rolling trays wholesale pages in case you decide DIY isn't your jam and you want to check out some ready-made options. Let's get into it! ✨
Table of Contents
- Why Make a Custom Glitter Rolling Tray?
- Materials & Tools You'll Need
- Step-by-Step Guide: DIY Glitter Rolling Tray
- Design Ideas & Variations
- Custom Rolling Trays by RYOP (Promotional)
- Frequently Asked Questions
Why Make a Custom Glitter Rolling Tray? 🌟
Sure, you could just buy a rolling tray, but making your own glitter tray is way more awesome. First off, it's a one-of-a-kind statement piece that reflects your personality. You choose the colors, the sparkle level, the whole vibe – so it ends up exactly how you want. Second, the pride factor is real – every time you use it you can say "Yep, I made this." And let's not forget, DIY is just fun (and maybe a little therapeutic). So if you're looking to add personal flair to your rolling setup or need a great gift for a friend, a DIY glitter tray is totally worth it.
Materials & Tools 🛠️
Gather up the following supplies before you start (nothing kills the vibe like having to run to the store mid-project):
- Tray base: A blank rolling tray (metal or acrylic works great). You can snag these online or use a small cookie sheet or wooden tray from the craft store. Just make sure it has a flat surface and raised edges (so resin doesn't spill off).
- Spray paint or acrylic paint: For the base color or background design. Pick a color you love for the backdrop. Spray paint is quick and gives an even coat; acrylic paint and a brush work too if that's what you have.
- Epoxy resin kit: You'll need a 2-part clear epoxy resin (resin + hardener) to create that glossy finish. Most craft resins will do; get enough to cover your tray (check the kit's coverage info). Also grab mixing cups, wooden sticks for stirring, and a disposable or silicone spreader.
- Glitter: The star of the show! Fine glitter, chunky glitter, holographic glitter – any kind you like. You can go for one color or mix and match. (Having extra is better than not enough, and any leftovers can be saved for future crafts.)
- Stickers or decals (optional): If you want to add images or a logo, grab some stickers or print out a small photo. You can later embed these under the resin for a personalized touch.
- Protective gear: Gloves (a must when working with resin, and they keep glitter off your hands), a dust mask or respirator (for fumes and sanding dust), and an apron or old clothes (glitter tends to linger on fabric, and you might find sparkle on you for days!).
- Tools & extras: Painter's tape (to mask off areas and catch resin drips under the tray), a drop cloth or newspaper (to protect your table/floor), sandpaper (around 220 grit to lightly scuff the tray surface for better paint adhesion), and something to pop bubbles in the resin (like a heat gun, small torch, or even a straw to blow through). Also, ensure you have a level surface for the tray to sit on while curing – resin is self-leveling, so your tray should be level too!
Step-by-Step Guide: DIY Glitter Rolling Tray ✨
Alright, it's time to roll up those sleeves and get to the fun part. Follow these steps, and you'll have your own glittery masterpiece ready to shine.
Step 1: Prep Your Tray and Workspace ✅
First things first: prep. Lay down your drop cloth or newspapers to protect your work area (and to catch rogue glitter later). Take your tray and give it a nice wipe down. If it's metal or glossy, a quick light sanding (use that 220 grit sandpaper) will scuff the surface just enough to help paint stick. Wipe off any dust from sanding with a damp cloth or some rubbing alcohol on a paper towel. Let it dry.
Got your gloves on? Good. Also, ensure you've got good ventilation, especially if you're about to spray paint. Open a window or work outside if possible. Line up your supplies so you won't be scrambling mid-project. If you're using stickers or cut-outs for decoration, have them ready. Think of this step like getting your mise en place ready in cooking – a little prep now makes the rest of the process smooth sailing. 🎶
Step 2: Base Coat the Tray (Color & Prep) 🎨
Time to add some color to that tray! This will be the backdrop for your glitter. If you're using spray paint, shake that can for a good minute and then spray in light, even coats. Start each spray burst slightly off the edge of the tray and sweep across to the other side, so you don't get paint pooling in one spot. It's better to do 2-3 light coats than one heavy coat. You'll avoid drips and get a smoother finish. Let each coat dry for the few minutes specified on the can.
If using acrylic paint and a brush, pour a bit of paint out and brush it on with nice even strokes. You might need a couple of coats to get solid coverage. Just be sure to let the paint dry between coats. (Tip: a foam brush can help avoid streaks.)
Feeling artistic? You can totally get creative with the base. Do a two-tone fade, polka dots, or that cool marble effect. For a marble look with spray paint, spray your base color first. While it's still wet, quickly spritz a second color in random lines or swirls. Then take a wadded plastic wrap or a plastic bag and gently press it onto the paint, then lift. It creates funky marbled patterns! Add a third color if you're feeling it, and repeat. There's no wrong way to do this – each pattern will be unique.
Once you're happy with the paint job, let the tray dry completely. I'd give it at least an hour to be safe (longer if it's humid). The paint should be fully dry to the touch before we move on to the sparkles. Meanwhile, you can start getting your resin ready (read the instructions so you're prepped when it's go-time).
Step 3: Add the Glitter Magic ✨
Now for the part you've been waiting for – let's get glittery! Make sure your tray is on a flat, protected surface. If you have spare paper, put a big sheet under the tray to catch excess glitter (so you can funnel it back into the jar – waste not!).
Mix up a batch of epoxy resin according to your kit's instructions. Typically it's equal parts resin and hardener. Stir it thoroughly for a couple of minutes, scraping the sides of your mixing cup. Proper mixing is key to resin curing right. We're going to do this in two stages: a thin layer to hold the glitter, then a clear coat on top.
When your resin is mixed, pour a thin layer into the tray. You don't need a ton – just enough to cover the bottom. Use a stick or gloved finger to spread it out evenly. Think of this like spreading frosting on a cake, but thinner. This thin resin layer is what's going to grab onto your glitter.
While the resin is still wet, start sprinkling on the glitter. 🌈 Go wild or be strategic – your call. For full coverage, add glitter until you barely see the paint beneath. For a sparser, galaxy-like look, sprinkle gently and let some background show through. You can even mix colors: maybe a blend of gold and pink, or fine glitter plus a few chunky pieces for texture. The resin will soak in the glitter and hold it as it cures. If you spot a bare area, sprinkle a bit more there. If you completely overshoot and dump on too much, gently tilt or tap the tray to let excess fall off onto your paper. You have some working time (resin stays workable for 20-40 minutes depending on the brand), so adjust the glitter until it looks just right. Once the resin starts to thicken and gel, leave the tray flat and stop fiddling with it, so everything stays evenly distributed.
Now, patience. Let that thin resin layer cure enough to hold the glitter in place. It doesn't have to be rock hard, but we want it firm to the touch so glitter won't all float up when we pour the next layer. Depending on your resin, this could be anywhere from 4 to 6 hours, or even overnight. (If you tap the edge of the tray and it feels semi-solid, you're good to go.)
Step 4: Seal it with Epoxy (Clear Coat) 💧
Time to seal the deal (literally). Mix up a new batch of resin for the final flood coat. This one should be enough to cover the entire tray surface with a nice thick gloss. Depending on the size of your tray, that might be a few ounces of mixed resin. (It's always better to mix a little extra than to come up short mid-pour.)
Slowly pour the clear resin over the glitter layer. Start in the center; you'll see it spread out. You can guide it to the corners with a stick if needed. Pour until the resin dome is just at the top of the rim but not overflowing. Sometimes you might need to tilt the tray a tiny bit to help it level out, but if your table is level, the resin should do most of the work.
Now, look closely for bubbles. You'll almost always have some. Take your heat gun or torch and quickly go over the surface in a sweeping motion. You'll see those bubbles pop and the surface become smoother. Be careful with this step: keep the heat moving and don't get too close, or you could scald the resin or cause it to ripple.
After de-bubbling, if you notice a stray hair or bug (it happens, even to pros!), use a toothpick or tweezers to fish it out gently. The sooner the better; once the resin gets thicker (in an hour or two), you don't want to disturb it.
Now cover the tray with something like a clean box, and let it cure. Usually, 24 hours is the magic number for a full cure, but check your resin's instructions. Make sure it sits somewhere safe and undisturbed while it sets up.
When it's fully cured, the resin will be hard and not at all tacky. But don't worry, we'll talk cure time in a sec for safety. For now, bask in that crystal-clear shine – you've essentially laminated your artwork in glass! 🤩
Pro Tip: If you put painter's tape under the tray earlier, peel it off after the resin partially cures (like when it's gel-like). It will take the drips right off. If you missed that chance, no biggie: you can sand off any hardened drips on the bottom later for a clean finish.
Step 5: Finishing Touches & Curing 🏆
Your tray should now be glittering like a galaxy and smooth as glass. But hold up, we have a few final touches to make it next-level. Once the resin is fully cured (again, usually give it a solid 24 hours, better 48 to be sure), inspect the tray. If you see any rough edges or little uneven bits on the rim, take some fine sandpaper and gently buff them smooth.
Remember those optional stick-on rubber/silicone feet? Now's a great time to add them to the bottom corners of your tray. They not only protect your tabletop from any minor rough spots, but also give the tray a nice grip. No one likes a tray that slides around.
Now, about using the tray: Epoxy resin, once cured, is waterproof and pretty darn durable. Still, it's best to wait a couple of days before putting the tray to heavy use, just to ensure the resin has hardened completely. In the meantime, admire it! Tilt it in the light to see the glitter dance. Show it off to a friend (you have bragging rights now).
If you included any decals or images under the resin, congrats – you basically made functional art. You could even sign the back of the tray with a metallic sharpie to mark it as your creation. 🌟
Alright, moment of truth – put your new tray to use! Go ahead and use it during your next rolling session or even as a sparkly organizer on your desk – you'll love the personal touch it adds to your space. And hey, you made it yourself. How cool is that? 😎
Design Ideas & Variations 🎨✨
By now, you're probably already itching to start another tray – this DIY can get addictive! Here are some cool ideas and variations to inspire round two and beyond:
- Color fades & ombré glitter: Use one color of glitter on one end of the tray and another color on the other end. Let them blend in the middle for a sweet gradient effect. For example, a shift from deep purple to bright pink looks ultra-cool.
- Custom decals under resin: Print out a favorite image, your name in a cool font, or a small graphic (like a cartoon character or brand logo). Stick it onto the painted tray before you do the glitter/resin steps. When you pour the resin over, it'll look like it’s embedded under glass. People will wonder how you did it! 😏
- Glow-in-the-dark elements: Yes, they make glow-in-the-dark glitter. Mix a pinch of that in, or use glow powder around the edges of the tray. When the lights go out, your tray will emit a cool glow. It's both fun and kind of practical if you ever use your tray in low light.
- Matching accessory set: If you enjoyed this project, why not make a matching set? You can create a coordinating glitter ashtray, lidded stash jar, or even a coaster using the same technique. Everyone loves a matching set, and it ties your whole vibe together.
The sky's the limit with customization. The more you experiment, the more unique custom rolling trays you'll have in your collection (or to gift away, if you're feeling generous). Each one will be a reflection of your style and creativity. And who knows – you might just start a trend among your friends or even kick off a small side hustle selling these bad boys! 😉
ROLLYOUROWNPAPERS.COM Custom Rolling Trays 🚀
Want the bling without the DIY fuss? We produce premium rolling trays with custom designs at our factory – so you get a pro-grade tray with zero mess. At ROLL YOUR OWN PAPERS (RYOP), we create high-quality custom rolling trays that you can design without lifting a finger. From choosing the artwork to adding special features (we can do metallic finishes, full-color prints, you name it), our team handles it all and delivers a tray that’s ready to use right out of the box.
Need multiple trays for an event or your business? We’ve got you. You can order custom rolling trays wholesale in bulk and get a sweet deal. Whether it's for a store, a promo campaign, or just because you have a lot of friends who all want one now (it happens!), we can scale to your needs and maintain top-notch quality on every single tray.
🔥 Ready for a hassle-free custom tray?
Skip the DIY and let us do the work. Check out our custom rolling trays collection for one-of-a-kind designs, or custom rolling trays wholesale if you mean business. We’ll print your art, add any glitter or special touches you want, and ship it to your door – all sparkle, no stress.
Frequently Asked Questions 🤔
Q1: What type of tray is best for a glitter DIY?
A: A plain metal tray is most popular because it's sturdy, paint adheres well, and it won't warp with resin. But you can also use wood or acrylic plastic trays. Just make sure whatever you use is rigid and has that lip around the edge to hold everything in.
Q2: Do I have to use epoxy resin, or can I use something else to seal the glitter?
A: Epoxy resin gives the best glossy finish and durability. However, if you can't use resin, some people do multiple coats of clear acrylic sealer or use a product like Mod Podge Hard Coat. Just note the finish won't be as smooth or durable as resin. UV resin is another option for smaller areas if you have a UV light.
Q3: How do I avoid making a huge glitter mess?
A: Glitter is notorious for spreading everywhere, but you can minimize it. Do your glitter work over a large sheet of paper or a tray so you can catch excess and pour it back. Wear gloves (so you don't sparkle for a week) and wipe surfaces with a damp cloth or use a lint roller after to pick up strays. Work in a space that's easy to clean. A small handheld vacuum or a piece of play-dough can pick up lots of stray glitter too!
Q4: How long does it take to make a glitter rolling tray from start to finish?
A: Active crafting time is just a few hours (painting and pouring resin are pretty quick). However, waiting for things to dry/cure is the longest part. Paint might take a few hours to dry, and resin usually needs about 24 hours (sometimes more) to fully cure. So overall, give it around 2 days from start to ready-to-use tray, just to be safe.
Q5: Is it safe to use the tray once it's finished?
A: Yes, as long as your resin is fully cured. Quality epoxy resin, once cured, is generally food-safe and inert (meaning it won't leach chemicals). Just make sure it's cured in a clean environment. If you're going to use it to serve snacks, you might line it with parchment paper just to be extra cautious. But for normal use like rolling, a fully cured resin surface is perfectly fine.
Q6: Can I clean my glitter tray without ruining it?
A: Definitely. The epoxy surface is pretty tough. To clean it, just wipe with a damp cloth. If you get any sticky residue on it, a little rubbing alcohol on a cloth will take it right off. Avoid abrasive scrubbing pads as they can scratch the resin's shine. And while it might be tempting, don't toss your tray in the dishwasher – prolonged hot water and detergent could dull the finish or affect the paint.


Leave a comment